Lampworking

How to Make a Bead

How to Make a Bead

In this post, I will introduce a very basic method of making a simple round or donut shaped glass bead. A nicely shaped round bead is the very first technique a beginner lampworker needs to learn. It may look simple, but it is deceptively so. You will need to learn to control glass in and out of the flame to make it nice and donut round.

Safety and Disclaimer

Lampworking is dangerous! It involves manipulating very hot glass with an open flame. There are very real risks of fire. Please refer to my "Lampworking Safety" post for safety precautions and details. You resume all responsibility for your own safety! Do not lampwork without understanding all of the risks.

How to Make a Bead

Here's a step-by-step guide to a very simple round bead with no embellishments or patterns:

Preparations: Coat your mandrels with bead release the night before. I dip my mandrels so that about 4-5 inches on the end is coated. Some people like dipping mandrels in the middle so you can hold it with both hands. It is personal preference.

The bead release that I use is Fusion Bead Release. It is very very strong. I've never had a bead break the bead release while I am working on it, even when using bead presses and molds. It's even a little too strong, since it requires some force to get the beads off the mandrel after annealing.

Some bead releases are flame dry, so you can dip them and dry them in the torch flame as you need them. I always air dry mine, so I dip mandrels the night before.

It is a good idea to invest in good bead release from the start. It's a cheap thing, and will save you from lots of frustration. I previously had a cheapo bead release that came with my hothead kit, and I was constantly frustrated from beads breaking the release off the mandrel when I did so much as poke a plunged dot! I'd end up with a half made bead spinning on the mandrel, dangerously close to sliding down to my hand! Just get good bead release - you'll thank me!

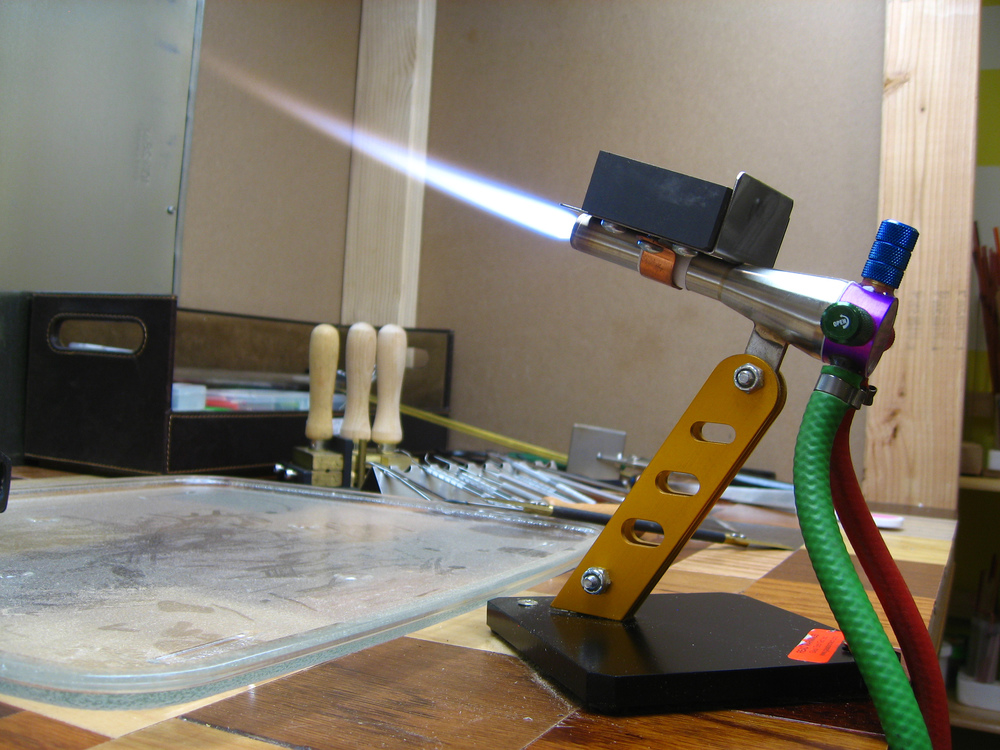
Turn on torch. If you have a hothead, turn on your fuel and light the flame. If you run on propane/oxygen, remember POOP!

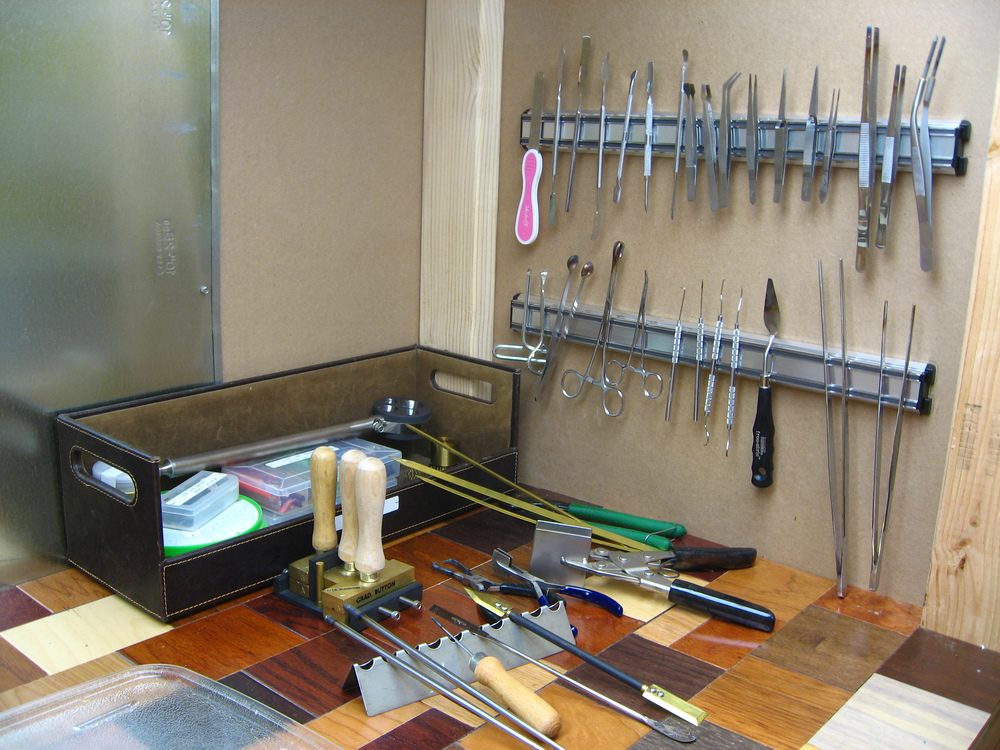
Assemble all of your glass and tools, and put them in an easily accessible location on your bench. You don't have a lot of time to be searching for tools when you have a hot bead on a mandrel in one hand, so it's best to have everything organized and ready to go before you start.

Step 1: Heat the glass rod. To do this safely, you have to move the rod in and out of the flame so it heats slowly. Also twirl the rod so gravity plays on it equally, never letting the end droop too far.

If you stick the rod in the flame too quickly, the glass rod is prone to shatter. Tip: start heating the glass rod by putting it in the very top of your flame where the fire is coolest. Then slowly bring the rod closer to the widest part of the flame. I usually work in the flame area about 3-4 inches from the torch. You should see the glass rod start to ball up as it melts. Don't let it get so hot that it melts.

Step 2:As the glass gets hot, start heating the coated mandrel as well. It should heat to an orange glow.

I am right handed, so at this point I usually have the glass rod in my right hand, and the coated mandrel in my left hand. Head up the bead release on the mandrel until it glows. This will allow glass to stick to the bead release. If your mandrel is not hot enough, your glass will not catch. Just heat it up a little more.

Step 3: As the glass becomes molten, start winding it around the heated mandrel. The glass and the mandrel should be in the flame as you do this.

I still have the glass in my right hand, mandrel in my left. I usually wind the glass a few times completely, until I get a size that I want.

Step 4: When the bead is the size you want, start pulling the glass rod away from the mandrel, continuing to rotate the mandrel the whole time. The glass will get thinner and thinner, and eventually break, a technique known as flame-cutting.

Rotate the bead on the mandrel around, and let gravity shape it. I rely on gravity to shape my beads quite a lot. I believe that you should never start using tools until you can consistently make good symmetrical beads using only fire and gravity.

Heat the bead in the flame to get it soft and movable, but not dripping! Take the bead out of the flame and rotate it along the axis of the mandrel, allowing gravity to shape it as it cools. Reintroduce the bead to the flame and repeat this step until the bead is nice and round. It is important to shape the bead outside of the flame when you are a beginner, until you learn flame characteristics. It is too easy for a beginner to heat their bead too hot, and have it drip off the mandrel into the bench. However, you must also be aware not to keep it outside the flame for too long, since if the bead gets too cold, it will crack! You want to keep the bead at the "just right" temperature.

Step 5: Take the bead out of the center of the flame to its cooler edge. Continue rotating the glass. This process is called flame annealing -- it makes sure the glass' temperature doesn't drop too quickly, which can cause it to break.

There is some controversy over whether "flame annealing" is really "annealing". It is definitely not good enough to "flame anneal" your beads without going into a real annealing cycle in the kiln. But it is better than nothing, especially if a beginner does not own a kiln.

That said, I will still typically flash my beads in the flame just before I put them in the kiln to garage. Just don't think that "flame annealing" will get you off the hook for buying a real kiln. It won't. A percentage of your beads will still crack if not properly kiln annealed. For further discussion on the science of annealing, see my "Science of Glass" post.

Step 6: Further anneal the beads using either vermiculite or fiber blankets, and then eventually a kiln.

I sound like a broken record but - kiln anneal if you can, fiber blanket or vermiculite if you don't have a kiln. To anneal the beads, you just put the bead (still on the mandrel) into a kiln. Usually you leave one end of the mandrel poking out so you can still move the bead around to make room for other beads if necessary. Run your annealing protocol (see my recommended protocols here), then wait several hours for your beads to anneal and the temperature to be brought back down to room temp.

Step 7: Once the beads are at room temperature, soak them in a bowl of water that is also at room temperature. Then you can more easily remove the bead from the mandrel.

This step is optional, but soaking the bead release in water helps in easing the beads off of the mandrel, especially if you are using extra strong bead release like Fusion Bead Release. If you have any persistently stuck beads, I have found that using a simple riveter works really well to remove beads stuck on mandrels. I recommend this one.

Step 8: Use a bead hole reamer to clean out the hole.

Once you have removed the bead from the mandrel, you will still have some leftover bead release inside the hole of the bead. You want to clean this out before you use it for any jewelry purposes. You can buy a bead reamer to remove the bead release manually. However, I have found it is faster to use a long diamond coated reamer as a dremel insert. You can use the dremel to clean out beads much faster than doing it one by one by hand.

And voila! You have a bead! I hope this short tutorial is helpful for beginners interested in getting into lampworking! If you have any questions or comments, please reply in the comments section below! Thanks

Lampworking Ventilation Guide

I hope you have read my "Lampworking Safety" post. Here I am going to go into more detail on proper ventilation for your lampworking studio. Ventilation is a very complicated, but VERY important safety issue that most people do not spend enough time thinking about.

#Ventilation

This is an often overlooked topic. Ventilation is very, very important for lampworking! The fuel used to supply the torch flame (usually propane) does not combust completely, and so propane gas fumes may linger in the torch area unless the area is adequately ventilated. The flame also produces by-products of combustion including carbon monoxide and nitrous oxide. These must be actively removed, otherwise prolonged exposure will cause respiratory and irritant problems.

Additionally, the process of heating up glass releases metal fumes in the air. If you have ready my "Science of Glass" article, then you know that the colors of glass are due to transition metal impurities in the glass. When heated to molten hot temperatures, the metals are also fumed and released into the air. Heavy metal poisoning is a severe health danger associated with glassworking. Any other products that you use in your glass, including enamel or leaded frit, will also add to the ventilation problems.

The most dangerous products include NO2 nitrous oxide and CO carbon monoxide. NO2 is a severe respiratory irritant, while CO is highly toxic. Carbon monoxide is a colorless, odorless gas that displaces oxygen in your red blood cells' hemoglobin. Carbon monoxide poisoning is serious, which is why having a carbon monoxide detector in your lampworking space is critical.

To adequately ventilate your lampworking space, you must

  1. actively remove the fumes generated at the torch and also
  2. replace the air removed with clean air.

##To do this, you will need:

  • A Fan - I have a hydroponic in line Max Fan. My fan is a 10 in inline fan, which is a little bit overkill. You can probably do with a smaller 6in or 8in inline fan. The smaller size is probably better actually because it was very difficult to find large diameter ducting, and I had to special order it. Six to eight inch diameter ducting should be available at a local home improvement store.

Edit: I have had a lot of people ask me about Fan recommendations. Here is a 10 inch inline fan similar to the one I have. I think the Can Fans and the Max Fans are very good. Alternatively, here is an 8 inch inline fan that is highly recommended. I would also get a rheostat of your choice.

If you want something a little bit smaller, here is a 6 inch inline fan. For this setup, I would also get a rheostat and some clamps.

They also make 12 inch and 14 inch inline fans, but honestly I think unless you are using this for a large teaching studio setup, this would be overkill. I think a 10 inch fan is plenty for individual use.

  • Ducting - You need to buy ducting the same diameter as your fan. I special ordered rigid 10in ducting. I choose rigid ducting rather than the collapsible flex ducting because flex ducting introduces more turbulence to the airflow in the duct, making it much louder. Rigid ducting greatly reduces the noise from excessive air velocity through the ducts, and is far superior than flex duct. If you go with rigid duct, make sure you buy elbow ducting as well for all of the corners you may have to traverse.

  • A silencer - I use a rheostat to control the speed of my fan. My fan has only an On/Off, and you cannot adjust the speed of the fan to somewhere in between OFF and MAX. This is where my rheostat comes in. A rheostat is an adjustable resistor. It can control the amount of voltage going to an electronic device, like the fan, thereby adjusting the speed that the fan moves at. You can have infinite control with a rheostat, so instead of having just a Low/Med/High preset speeds, you can adjust to any speed from OFF to MAX. I needed the rheostat because my fan on the Max setting was much too powerful and too loud. (It would even propel itself off of its surface if not anchored down!) I now use the 10in inline fan at about 50% speed, and it is SO QUIET!

  • A way to contain fumes - Some people use a boot register or reducer in front of their torch to catch the fumes. Some people use a kitchen hood type of extractor. I personally have a custom built fully enclosed hood that is closed on 5 sides, with only the front open. The hood is similar in design to biological fume hoods used in laboratories for sterile culture. Because my 10 inch Max Fan is so powerful, I am able to construct a hood that covers my entire lampworking desk. You should calculate how much volume (in cubic feet) you will be able to extract with your setup (fan speed and ducting diameter and length). I like my setup, it allows me to have all of my tools on hand on my desk with no physical barriers, while working in a fully ventilated system.

  • An exit - Your ducting must directly to the outside to remove fumes and combustion by-products. I have my ducting exiting out a window in my room. I also had a window box built to disguise the ducting coming out of the window, since it is pretty industrial looking.

  • A return - Now that you have removed the "bad air," you will have to allow fresh good air to replace it in your work space. My setup is not perfect for this, since I have to work in a room attached to the main house (not recommended for fire safety purposes). I also have to work with the door closed to prevent cats from entering (cats plus flame plus glass beads do not mix!). Also, my room only has one window, which I have used for the exit ducting. Ideally, you will want fresh air coming from a second window (ideally on a different wall or area of the room as the exit ducting). As it stands now, I have my return air coming from under the two doors to the lampworking studio. The studio is under noticeable negative pressure as I work with the ventilation system on, so I know my return air is not sufficient to replace all the air exiting. So when you setup your lampworking studio, make sure you consider a good source of return air. An easy solution would be if you could work with an open window or open door behind you.

Conclusion

I hope this lampworking ventilation primer makes sense. My system might not be perfect, but it works very well for me, and seems very effective. You can use this as an example of what kind of ventilation works, but because each person's lampworking studio is different (size of available space, location of windows and doors, number of windows and doors, etc), each person's ventilation system will have to take into account all of those parameters. I advise you to seek professional advice before setting up a system. But if you have any general questions, I will be happy to answer if I can. Please comment below!

Lampworking Tools

Lampworking Tools

Close up of the shaping tools I keep in my lampworking hood. Yes, I use lots of pokers and mashers! (Note my beautiful patchwork wood desk!)

Close up of the shaping tools I keep in my lampworking hood. Yes, I use lots of pokers and mashers! (Note my beautiful patchwork wood desk!)

The most basic tools necessary to make a glass bead are glass and a flame source. But because glass must be kept molten hot to manipulate it, we need special tools that can withstand the heat of the flame in order to shape and form glass as desired.

Often, tools are made of metal or graphite, since both of these materials can withstand the high temperatures in a torch flame. Graphite is unique because it does not stick to molten glass, so many marvers and pokers are made of graphite. Steel, tungsten, and brass are commonly used metals.

Required Tools

  • Torch/Bench burner - this is a fixed torch that creates the flame. Torches can be fueled by MAPP gas, or a mixture of propane and oxygen. (rarely, natural gas and oxygen is also used). I work on a GTT Lynx, but I previously started on a Hothead. I encourage beginners to start on a Hothead to make sure they like lampworking before diving into the more expensive options.

  • Fuel - the easiest fuel source is to get a Hothead torch that can run on small cans of MAPP gas or propane gas (buy this at Home depot or equivalent store); a hotter fuel source is propane/oxygen. I have a small BBQ tank of propane that lasts for several months of beading. Oxygen is used more rapidly, and rather than deal with the hassle of having large unwieldy oxygen tanks in my studio, I choose to purchase an oxygen concentrator which can purify oxygen directly from room air. An oxygen concentrator is a few hundred dollar cost, but will save money in the long run if you intend to bead for years to come.

  • Mandrels - basically a long metal rod that forms the "hole" of the bead. Glass is wound completely around the rod, and when the rod is removed after the bead is annealed, a hole going completely through the glass remains. Mandrels are also important so you can hold onto the bead without getting your hands too close to the flame.

  • Bead release - a clay like coating on the mandrel applied prior to winding glass around it. Bead release aids in removal of glass off of the metal mandrel. Without bead release (or with a crappy bead release) you end up with glass permanently stuck to the metal rod.

  • Glass - lampwork glass is usually sold in rods about 8mm in diameter. (Fusing glass that comes in flat sheets can also be used if you cut them into strips, but be careful of sharp edges!) Rods are just easier to manipulate and use for small scale lampworking.

    I recommend Effetre glass (COE 104) for beginners since it is relatively economical and comes in a wide variety of colors.

I do not recommend using bottle glass or window glass or any other "found glass" if you are just beginning. They tend to be "shocky," meaning they are prone to thermal shock when glass is first introduced into the flame, and are generally difficult to use. But found glass can be an interesting and fun to experiment with as you gain experience. However, you cannot mix glass from different bottles, even from the same manufacturer as different lots may have different COEs.

  • Fiber blanket, Vermiculite, Annealing Bubbles, or Kiln - Kilns are expensive (mine cost $745), but they are the best option. For those starting out, you can use a low cost alternative (fiber blanket or annealing bubbles). These are all methods to slow cool your glass beads back to room temperature. Kilns are the best because they slow cool the slowest and are infinitely programmable.

Kilns are used to anneal your glass pieces after they are produced. This means that a kiln will ramp the glass back to room temperature slowly to avoid thermal shock. The annealing process is required to relieve thermal stress and make glass more stable. Any glass you intend to sell or give to others should be kiln annealed to avoid eventual breakage.

Optional Tools

  • Kiln - I would consider a kiln to be practically required, unless you are a very new beginner, just testing the waters. If you find yourself getting frustrated losing your beautiful beads to thermal shock as I was, consider saving up for a good kiln.

  • Marver - A marver is a basically a flat piece of usually graphite material that you can use to shape your beads on. The marver draws heat out of the bead, so this can create interesting effects on special glass that have striking properties (change colors on heating and cooling). There are two basic types of marvers - a torch mounted marver that is fixed on top of your torch (this is nice to have to keep some smaller glass pieces like murrini warm) and a hand held marver, usually a block of graphite on a handle, useful for manipulating glass by hand.

  • Picks - usually either straight or with a 90 degree bend at the tip. These are useful in raking glass, poking bubbles into glass, or otherwise fine manipulations of molten glass. Do not use your tools directly in the flame, this will damage them over time.

  • Tweezers - useful for picking up small pieces of glass, removing amounts of glass from a hot bead, applying murrini or metal foil, etc.

  • Shapers, molds, and presses - These are all tools that will help you shape your glass to the desired form. You can purchase them in many shapes and sizes. They are nice if you have to make a set of consistently sized beads (for a bracelet or necklace set for example). However, do not rely too much on shapers and molds. In my opinion, you should be able to consistently make nice donut round beads without the help of any tools before you take the step to buy manufactured shapers.

  • Frit trays, glass shears, hot fingers, marble molds, bead reamers, bead coring machines...

    There are an endless amount of additional tools you can buy for your lampworking hobby! Please take the time to really learn the skills with the minimal amount of tools first before delving into everything else.

I have two magnetic strips installed on the side of my hood for holding even more tools! Tweezers and pokers are a necessity! There are lots of tools that I've re-purposed for lampwork use (pink nail file, painting spatula, dental tools, etc)

I have two magnetic strips installed on the side of my hood for holding even more tools! Tweezers and pokers are a necessity! There are lots of tools that I've re-purposed for lampwork use (pink nail file, painting spatula, dental tools, etc)

I hope you found this review of Lampworking Tools helpful. What tools have you found to be indispensable in your lampworking routines? Any tools you think I should add to the required and optional lists? Please feel free to comment!

What is Lampworking?

What is Lampworking?

Lampworking is:

  • an art
  • a form of glassworking
  • beautiful
  • a lot of Fun!
  • an expensive hobby
  • the process of using a flame torch to melt and mold glass

Lampworking is a process used in the forming of glass, typically smaller glass objects like beads, marbles, small sculptures, laboratory glassware, etc (usually less than 1-2 inches in diameter). You may be familiar with glassblowing, another glassforming technique that involves molten glass on a much larger scale (vases, vessels, plates, large sculptures).

Whereas glassblowing uses a very hot furnace (a glory hole) to heat the glass to white hot (around 2,400 F or 1320 C), lampworking uses a smaller torch to melt glass.

Brief History

Lampworking has started as early as the Egyptians over 5000 years ago. Many Egyptian decorative beads made in that era survive today, a testament to how durable and strong glass actually is! These original beads are thought to have been made in cone-shaped furnaces instead of the modern torch.

Lampworking became very popular in Murano, Italy in the 14th century. In the early days, glass was melted using the flame of an oil lamp (which is why it is called "lampworking"). They would blow air or use a bellows to direct flame from an oil lamp to heat pieces of glass. Lampworking in Italy was considered a very close guarded secret for about 400 years.

Eventually American artists began learning lampworking techniques, experimenting, and developing new styles. Today, most people use torches that burn propane and oxygen or portable MAPP gass.

Types of Glass

Soda-lime glass

  • the most common type of glass used in lampworking
  • "soft glass" because it melts at a lower temperature than boro
  • more brittle and prone to thermal shock than boro
  • has a much broader range of color than boro
  • can find unique colors including silver glass, metallics, opalinos, organics, webbing, etc
  • COE ~104

Borosilicate glass

  • "hard glass" because it requires higher temperatures (hotter, more expensive torches required) to melt than soft glass
  • more thermal stable, less resistant to thermal shock, less prone to cracking when cooled (therefore more forgiving to work with)
  • however, has a narrower working temperature
  • colors are more limited in range, but this is constantly expanding over time as boro gains popularity
  • some boro glass have very unique color properties not seen in soft glass (eg oxidizing or reducing glass)
  • more expensive than soft glass
  • COE ~33

(Other types of glass include Bullseye COE ~90, Spectrum COE ~96, Czech glass COE variable)

Beads, Marbles, Sculptures, and more...

When I say "lampworking," I usually refer to the process of making lampworked beads. However, lampworking is a versatile technique that can be used to make a variety of glass objects. Popular products include:

  • Glass beads for jewelry
  • Glass Marbles
  • Small glass sculptures and figurines
  • Hollow glass beads for storing small amounts of cremains, flower petals, dandelion seeds, small seed beads, sand, small shells, etc
  • Glass vessels with stopper, able to hold small amounts of liquid like perfume, holy water, etc

There are also a very large number of styles and techniques to be mastered in the art of lampworking. Examples of different techniques include:

  • Stringer application - for horizontal and vertical lines, scrollwork, surface decoration
  • Dots, plunged dots - for surface decoration, making flower petals, internal trapped bubbles
  • Raking - using a tool to manipulate and move surface glass
  • Encasing - covering a bead entirely in a layer of clear glass
  • Implosions - 3d flower, explosion, or vortex look inside clear glass, popular in marbles

Lampworking is a complex art, and one piece often requires mastery of many sets of skills.

Size Limitations

You can make many different types of glass objects using lampworking, but you are limited by size. Buying a larger and hotter torch can allow you to make larger glass objects, but there is an upper limit. You will never be able to make things as large as glass blowers with a furnace glory hole are able to (bowls, vases, paperweights, large sculptures).

On a Hothead torch, the maximum thickness is about 1 inch in diameter, assuming you have a digital kiln. Anything that big will need to be kiln annealed. A 1 inch marble is guaranteed to crack if cooled in a fiber blanket or vermiculite. Glass objects will be increasingly harder to melt on a Hothead as you approach the size limit. The hothead simply does not have enough heat to heat the glass completely through when it gets larger than about 1 inch diameter.

If you are interested in working larger, you must invest in a larger, hotter, and more expensive torch. You will also need to upgrade your fuel system to a propane and oxygen source. This comes with its own set of expenses (propane tank, fuel, propane regulator, fuel lines, check valves, flashback arrestors; oxygen tank and oxygen service if you want tanked oxygen, oxygen concentrator for an alternative, oxygen regulator, etc).

On this setup, you will be able to make glass objects up to about paperweight size <3 data-preserve-html-node="true" inches. I typically do not work so large. But if you decide to make large objects, understand that it will take longer to add glass and heat up to shape, so will require more and more patience the larger you go.

Additionally, larger objects must be carefully heated continuously. The parts of the object not directly in the flame will cool and be at risk of thermal shock if not evenly heated occasionally (insurance heat). For this reason, boro is typically favored for larger marbles and sculptures.

Larger sculptures can be created as long as no part of it exceeds 1-2 inches in diameter. However, legs or any long thin protruding parts are most at risk of thermal cracking and require insurance heating.

Lampworking is a very complex and intricate art, the mastery of which takes years of dedicated practice. However, it is very fun and rewarding, and soon you will have a beautiful collection of fine glass pieces of art!

What do you enjoy about lampworking? What techniques are you most interested in learning? Post links to your glass works of art below, I am interested in seeing everyone's work!

Additional Reading:

For more information on the Tools needed to begin lampworking, please continue on to my post "Lampworking Tools!"

For more information on the actual process of making a bead, please continue on to my post How to Make a Bead!

If you are interested in more chemistry and physics, look at "The Science of Glass!"