FACETING PROCESS
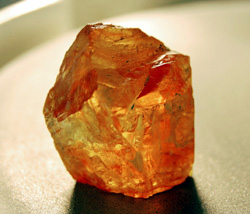
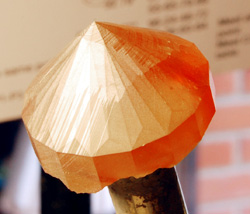
This section describes how a stone becomes a faceted gem. Here is a piece of rough sphalerite that we will follow step by step trough the complete faceting process. The size is some 4 x 3 cm and the weight is some 250 ct. It is almost clear but has very small cleavage fissures, some inclusions and slight color zoning. We will cut "Bright Angel" design shown in designs section.
1. Dopping
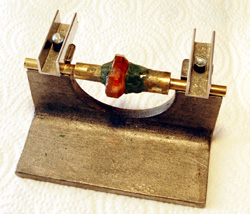
Dopping is the placing of the stone on a cutting stick known as a dop stick (a brass cylinder that will be mounted in the faceting machine). The dop axis will be the center of the future stone, so it is very important to centre the piece of rough very well. To fix the stone on the dop we use green wax and cyanocrylate ("Super glue"). The wax on the dop is heated using an alcohol lamp to make it softer, small drop of cyanocrylate is located above the wax and the stone is slightly pushed to the wax. Soft wax acts as a cast and the glue as a junction between the stone and the dop. Now we are ready to fix the dop in the faceting machine and start faceting.

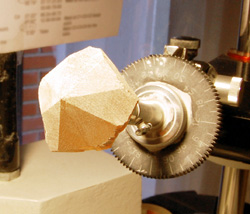
2. Pavilion preform
We start faceting the pavilion of the stone. Coarse grit discs are used to make a preform. It is in this step where a rough piece loses a lot of weight and gets a form and size similar to the future stone. Once this is accomplished, we measure the width of the stone so we can know quite exactly the weight of the future gem.
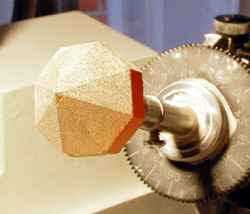
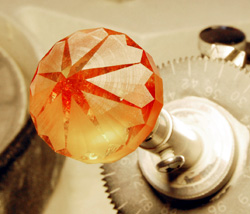
3. Faceting pavilion
Following the sequence marked by the faceting design diagram and using the fine grit discs all the facets are made. Frequently, some new little fractures show up during this step, which were invisible previously trough coarse surface of the preform. In these cases, you must decide to reduce the size of the stone to avoid them, or to proceed with the original size of the perform.
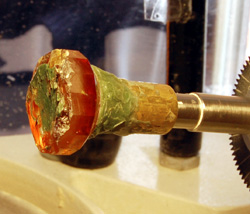
Polysynthetic twinning can be frequently seen in sphalerites at this stage, but it will be invisible after polishing. Now that we have pavilion almost finished, we can proceed to polish the facets..
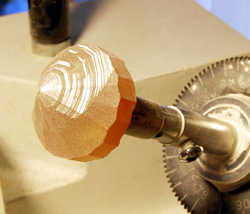
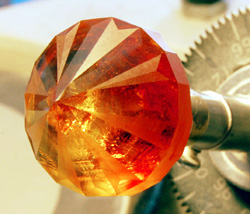
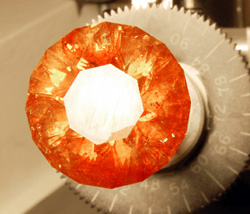
4. Polishing pavilion
With the first facets polished we will be able to take a real look inside the stone. Emotional moment! Now we will really see whether it will be loupe clean, eye-clean or more or less included… Nevertheless, if the stone have some inclusions, it’s quite difficult to know at this point how they will affect its brilliance. Only after we had faceted the crown and take the stone off the dop we can know it.
First only some facets are polished, then more and more, until we have the entire pavilion finished.
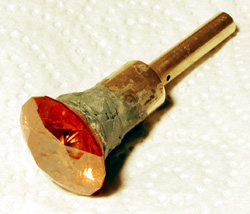
5. Transferring the stone
Now we have to facet the opposite side of the stone, the crown. For this, we will first paste a new dop to the pavilion using special transferring accessory to fix it totally coaxial to the first dop and to the stone.
Then we just heat the first dop to remove it, and the stone is ready for its crown to be faceted.
6. Faceting the crown
We make the same steps in the crown, including quickly removal of material with coarse grit discs, faceting and polishing, until we have the entire crown made, except the table.
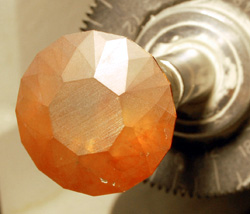
7. Making the table
For this step, special table dop is used that allow fixing the stone exactly perpendicular to its vertical axis. In this position we make the table and then polish it.

The stone is ready now, we just have to remove it from the dop and clean it.
8. Final step
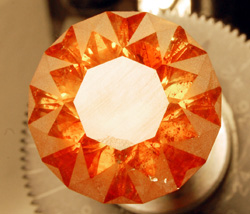
We heat the dop and the wax to remove the stone and then use acetone to dissolve the remaining wax and cyanocrylate. Finally, we can enjoy its beauty!
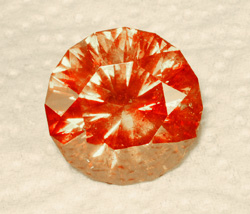
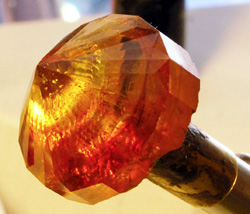
Weight 63+ ct, slightly included, fantastic brilliance and nice orange color.